

Mastering PVC Flooring Installation: Key Considerations for Success

PVC flooring, also known as vinyl flooring, has gained popularity for its durability, versatility, and wide range of design options. Whether you're a seasoned contractor or a DIY enthusiast, a successful PVC flooring installation requires careful planning and execution. In this blog post, we'll guide you through essential considerations to ensure a seamless and long-lasting PVC flooring installation.
- Surface Preparation: A solid foundation is crucial for PVC flooring. Ensure that the subfloor is clean, level, and free from debris, moisture, and irregularities. Fill cracks, gaps, and low spots to achieve a smooth and even surface.
- Acclimation: Allow the PVC flooring to acclimate to the installation environment for at least 24-48 hours. This helps the material adjust to the temperature and humidity conditions, reducing the risk of expansion or contraction after installation.
- Subfloor Type: Evaluate the type of subfloor you're working with. PVC flooring can be installed over various subfloor types, including concrete, plywood, and even existing flooring. Different subfloors might require specific preparation techniques or underlayment materials.
- Underlayment: Consider using an appropriate underlayment to enhance comfort, sound insulation, and moisture protection. Some PVC flooring options come with built-in underlayment, but for others, you might need to install it separately.
- Adhesive Selection: Choosing the right adhesive is critical for a successful installation. Opt for adhesive recommended by the PVC flooring manufacturer and ensure it is suitable for your specific subfloor type and conditions.
- Installation Pattern: Decide on the installation pattern before you begin. PVC flooring can be installed in various patterns, such as straight lay, diagonal, or herringbone. Plan the layout carefully to minimize waste and achieve the desired visual effect.
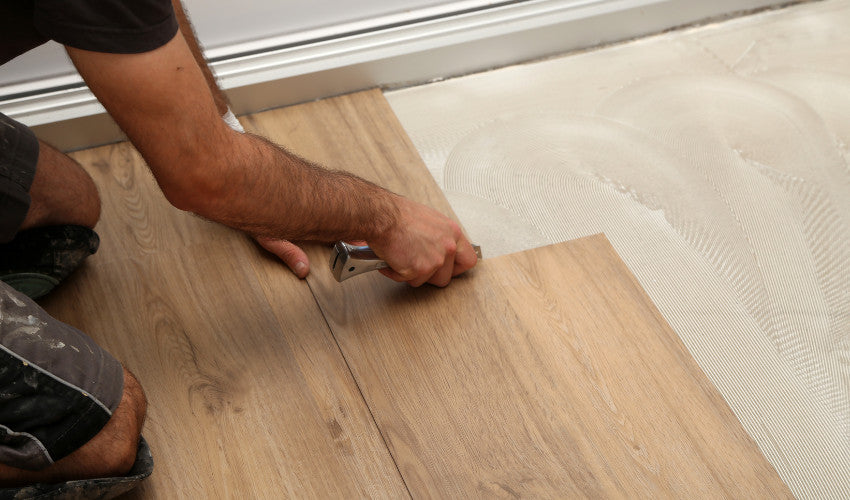
- Cutting and Fitting: Use accurate measurements and appropriate tools to cut the PVC flooring planks or tiles to fit the installation area. Precise cutting is essential for achieving clean seams and a professional finish.
- Adhesive Application: Follow the manufacturer's instructions for adhesive application. Apply the adhesive evenly and consistently, and work in manageable sections to ensure proper bonding.
- Rolling or Tapping: After placing the PVC flooring, use a weighted roller or tapping block to ensure a secure bond between the flooring and the adhesive. This step helps eliminate air pockets and ensures the planks or tiles are flat and even.
- Seam Alignment: Maintain consistent seam alignment throughout the installation. Ensure that the seams are tightly joined, and no gaps or overlaps are present.
- Finishing and Trimming: After the installation is complete, install any necessary transition pieces, trim, or molding to create a polished look and cover expansion gaps around the edges of the room.
- Maintenance Guidelines: Provide your clients with guidelines for maintaining their newly installed PVC flooring. Advise them on proper cleaning methods, avoiding harsh chemicals, and using furniture pads to prevent scratches.
Installing PVC flooring can be a rewarding project when approached with careful planning and attention to detail. By considering factors such as surface preparation, acclimation, adhesive selection, and proper installation techniques, you can achieve a flawless and durable PVC flooring installation that enhances the aesthetic and functional value of any space. Remember that each flooring type may have specific installation instructions, so always refer to the manufacturer's guidelines for the best results.